.webp.f0cace2e5487da32bf4746808333ed43.webp)


Twenty
-
Posts
1,131 -
Joined
-
Last visited
Content Type
Forums
Gallery
Events
Store
Downloads
Collections
Posts posted by Twenty
-
-
-
on the car pics! and does this make the bumper look lower? what did the other choices look like?
It's still waiting for 3M at this point. After that's done it will be installed. It'll make it look lower, because the black plastic you see here will be body colour:

This is the only other choice currently out for sedans:
A couple more should be due out this year. I know the individual who is overseeing that so I know what's coming.
-
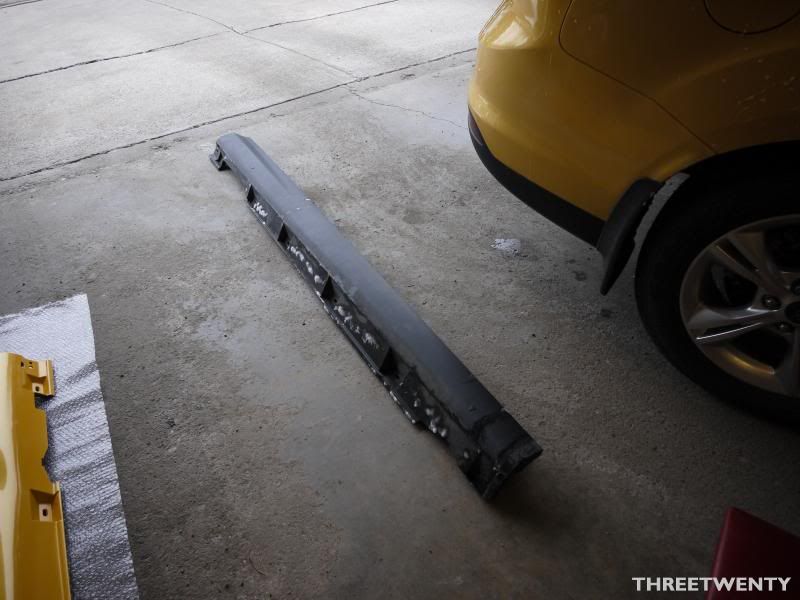
Rear valance, part I:
With a front lip and now the side skirts installed, the rear of the Focus still needed attention. Unfortunately, having a sedan limits options for a rear valance. Currently, the OEM and 3D Carbon pieces are the only choices. In comparison, the hatches have OEM from standard and ST models, 3D Carbon, Downforce USA, OEM Zetec S, and so on. New sedan parts will be coming later this year but with an early May deadline, I had to choose from one of the two current offerings.
I still wasn’t 100% sold on the 3D Carbon design and it was much more expensive than an OEM piece, so I ordered the factory part since I had a plan in mind for its paint scheme.
It quickly arrived and I unwrapped it to check it over. All looked good so I then handed it over to the body shop and explained the idea I had in mind.
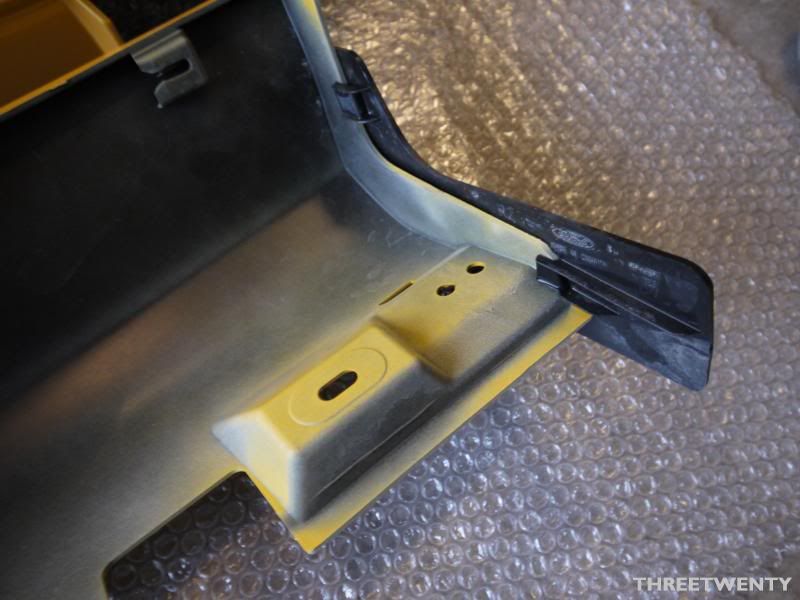
Today they called to let me know it was ready to be picked up, so I headed over right away. The picture below is a cell phone picture, sorry.
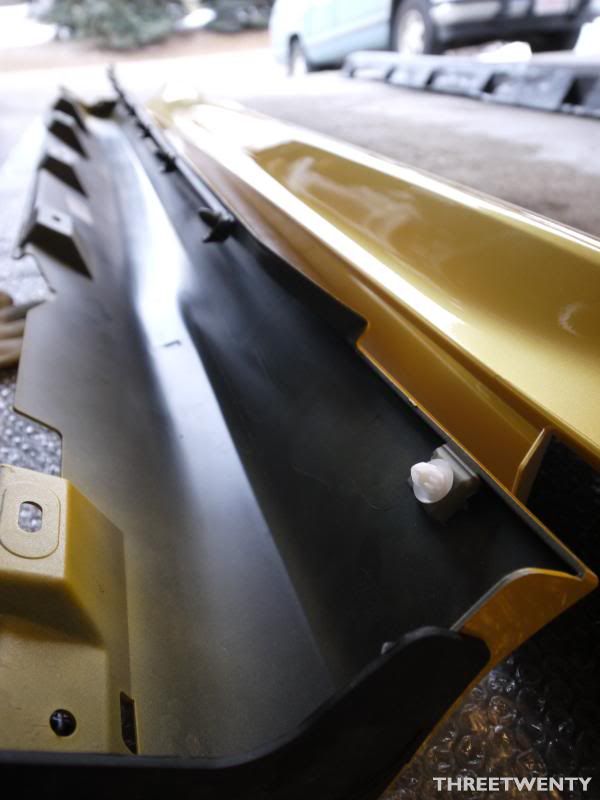
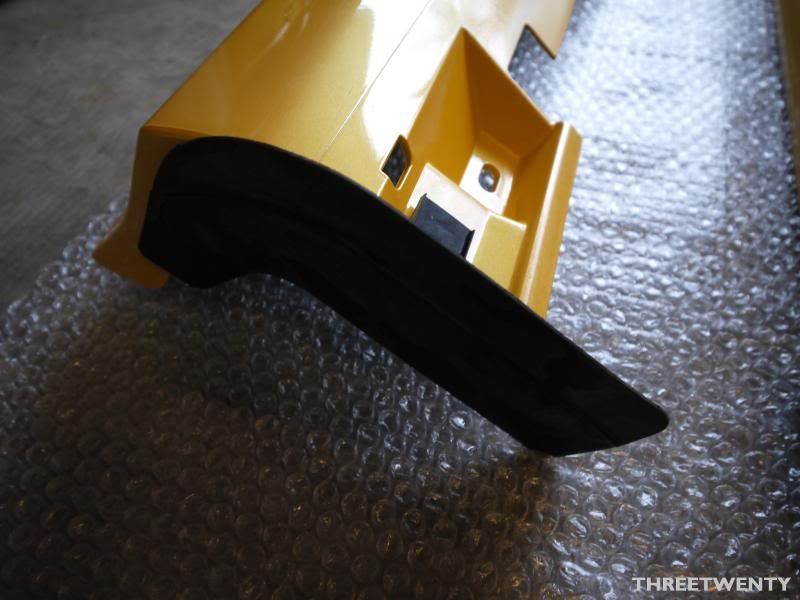
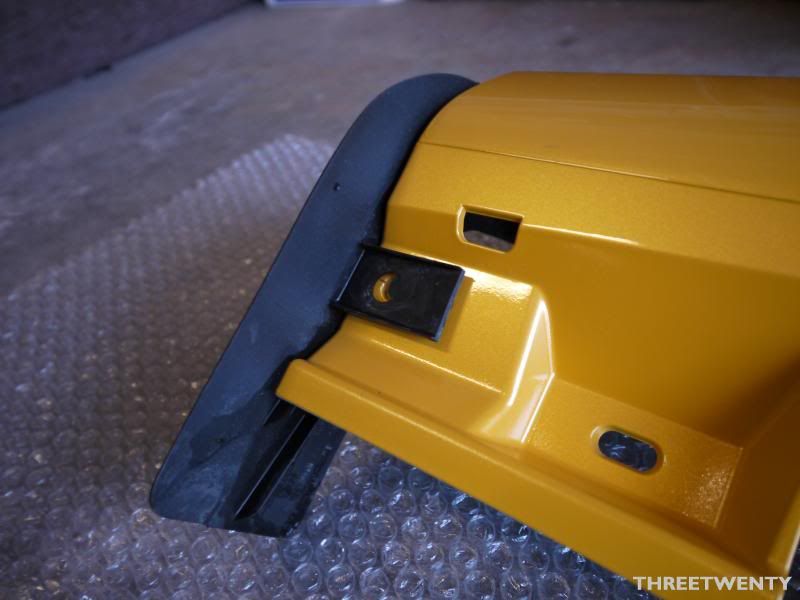
The paint scheme is one that has been done a time or two before on these valances. Because the factory exhaust is tiny and has a hidden tip, I didn’t want to highlight that by having the whole piece painted. Following the factory design, the central portion was left unpainted for contrast and to hide the lack of a proper exhaust tip. As well, the cross-hatch pattern between the reflectors was left alone as well. These are textured from the factory so to smooth that area would take far too much time and effort. The rest was sanded down though and then painted and cleared.
As much as I want to install this now, it will wait for a little bit and then be given a bit of 3M along the bottom since the mud flaps will come off when it’s installed.
May 4th keeps getting closer.
-
-
With how the tread title was displayed when I clicked New Content, I came here expecting to see a GT-R going off a jump.
Wrong in more ways than one.
-
-
that is looking nice.
Thanks!
More soon, waiting on another part to come back from paint.
-
Certainly looks much higher on the 'food chain' now, so to speak. Looks more important and imposing. I like.
-
OEM ST side skirts - installed:
Yesterday afternoon my coworker called to let me know that the side skirts had been wrapped in 3M and were ready to go. I promptly got down to the dealership and picked them up.
I decided that I'd just install them now, and get them out of the way.
Off came the original side skirts, after removing the front mud flaps and an assortment of clips. Note the frozen soap underneath from the car wash; it was cold.
The clips were moved over to the ST skirts. Fortunately I only broke one during removal but had lots of spares.
These little flaps were pulled off of the stock pieces and installed on the rear of the ST skirts. They fit right on and I assumed that was correct...but when I saw an ST at the car show today I noted it didn't have them. Hmm.
Regardless, with those on the skirts were clipped in place and I tidied up.
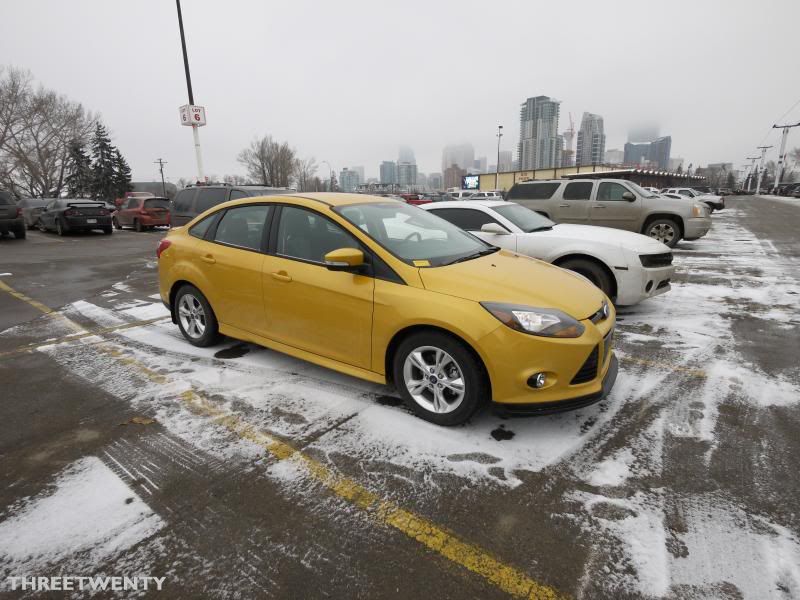
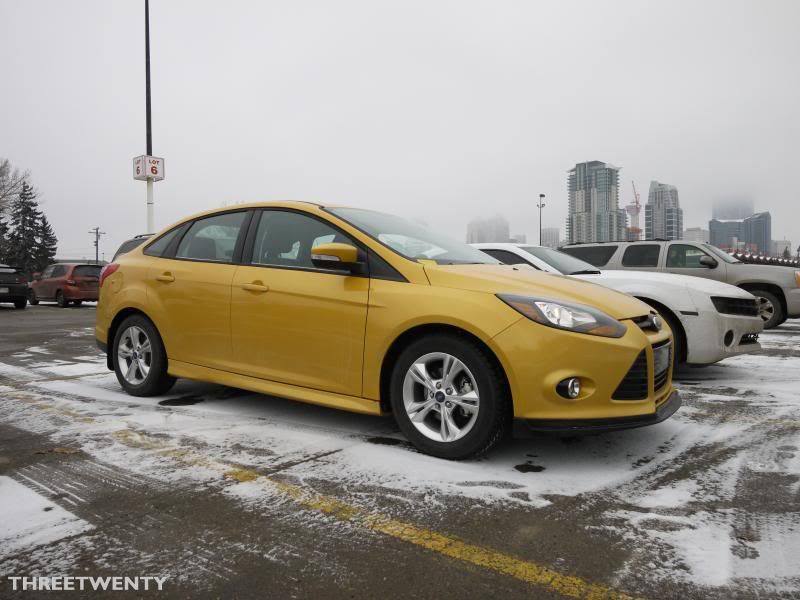
It was fairly late when I finished up last night, so quality shots were hard to get. Today following the trip to the car show I was able to get some relatively decent ones though, even though the car is dirty again.
Boy, do they make the stock 16s look small though. You'll also note the rear mudflaps are still on. I've yet to remove them.
-
Sure I'd love a GT or GXP but I like cheaper insurance and gas mileage better lol
If you can find a GXP, buy it anyway! Canada got 6.
-
Actually, not bad.
-
Here's my entry.
-
Oh my god I WANT!
Wait until we get the SS-V version of the Commodore VF.
-
Aside from the window area (mirrors, vents) it's not that bad. For some reason I don't HATE it.
Bomex-style (or Bomex) kit, I see. That was one of my favourites for the Supra and Integra.
-
Welcome! I'm happy to see another Albertan here.
-
Someone really needs a hobby...
-
That looks so good...
-
Are you gonna paint match the rear lower section of the rear bumper?
That will ultimately be replaced so it's staying as it is for now. A company in the US (of which I know the owner through another forum) will be producing rear valences for sedans later on.
With the show I plan to put this in only three months away, I'm pondering a temporary change to the rear, just to finish it off. I need to talk to a friend about that...
-
The side skirts are back:
This morning the side skirts were picked up, now wearing their new coat of Yellow Blaze. They look amazing and the paint is flawless; which makes it harder to have to wait to install them.
With the 'deadline' for the next round of updates a little under three months away now (the first big show of the season) I still have time to keep working on the car to get it ready, and these have a while to cure fully.
Next I need to track down a couple more clips which are unique to the ST side skirts, and new front mud flaps.
In the meantime, a few more photos...
-
I put 215s on an 8" wheel and got tons of hate from other W owners. Imagine what they'd say to this.
-
And I'm really liking the new vents. Thanks guys!
-
Today I stopped by the body shop to check the colour samples they had on hand. Unfortunately, all four varieties of Yellow Blaze on the sample card were too dark. A new base coat will be mixed and we'll check again tomorrow with more samples.
http://officialthreetwenty.wordpress.com/2013/02/14/trial-and-error-and-chinook/ -
I'd up the wheels an inch or two in diameter.
-
I would never buy a black car, but that looks great! Good thing you got it from a detailer.


Twenty's Twenty-twelve
in Other Autos
Posted
Euro tail lights, part I:
These, I was keeping as a secret while waiting for the box to arrive. Today FedEx dropped if off so I got right to work.
I will admit right now that these are not OEM lights but are identical inside and out. Ultimately I hope to track down OEM lights and swap them in though. A big thanks to Mike at Rebel Devil Customs for importing these and then sending them north to me.
The European sedans get rear fog lights built into their tail lights, seen here down from where the revese light sits.
Looking at the back, you can see where the second bulb goes.
With a meet to attend a few hours later, I wanted these to be installed right away. A quick comparison between North American and European:
And, installed!
Now, the reason this is listed as part one is because there is still more to do. I need to find a wiring loom so that the additional lights can be wired up properly. Fortunately I have a friend in the UK who can hopefully get that for me. I also need to decide if I'll wire these in as additional brake lights, or find the proper fog light switch as well.